Note: Sep 2015 - This tutorial has been updated for iOS9/Swift2.
Hello everyone!
Currently I’m hard at work on the 2nd edition of iOS Animations by Tutorials as me and my editors Greg, Rich, and Chris are aiming to release the book as soon as iOS 9 is out. As with all books published on raywenderlich.com this update is free for all existing PDF customers, so you can buy the book now and will still get the Swift 2.0/iOS 9 update for free.
This month’s issue is going to be a lightweight but fun introduction to creatively masking gradients.
Enjoy!
- Marin Todorov
Tutorial: Introduction gradients
This tutorial is designed for Xcode 7 and Swift 2
In Section III, Chapter 14 Gradient Animations of iOS Animations by
Tutorials I demonstrate how to animate properties on CAGradientLayer for fun
and profit. In this month’s issue I’d like to show you how to create animations
that involve a CAGradientLayer but do not animate that layer itself. Instead
you will create animations on the gradient’s mask content.
That in fact sound a bit more complicated than it actually is so I’d say let’s go ahead and just try out some Swift in Xcode to show you what I have in mind. By the end of the tutorial you will have on your hands a really beautiful animation:
By the author of iOS Animations by Tutorials.
Getting started
To avoid asking you to create an Xcode project and setting up the UI with Auto Layout I’ve prepared a starter project for you.
Download ColorIntroduction-Starter.zip, extract the contents of the archive, and open ColorIntroduction.xcodeproj.
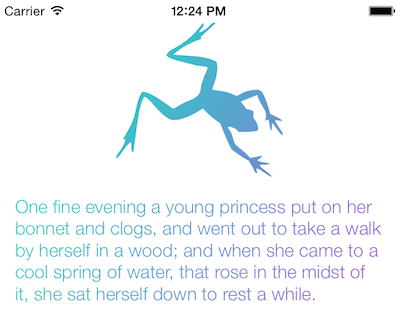
The project contains the starting scene of a game based on the fairy tale The Frog Prince. You will not code the game itself but you will get to create the intro scene where the player gets to read the first few paragraphs of the original Grimm story.
Main.storyboard contains a single view controller, which shows a single full-screen text label.
Open ViewController.swift and peak inside. You have an outlet to the label
called simply label; further you have a property called story where you have
the first few paragraphs of the fairy tale. And that’s pretty much it - let’s get
to work.
Adding the gradient
First you will create a gradient. Add the code to do that in viewDidAppear():
let gradient = CAGradientLayer()
gradient.frame = view.bounds
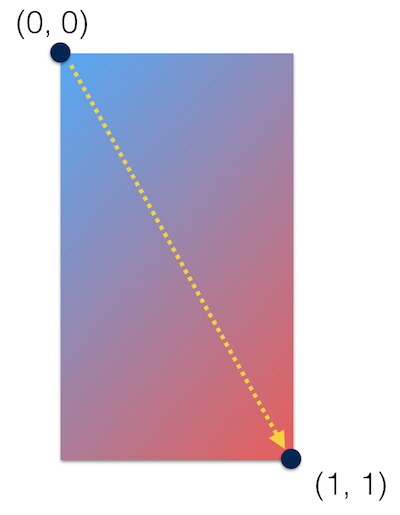
gradient.startPoint = CGPoint(x: 0.0, y: 0.0)
gradient.endPoint = CGPoint(x: 1.0, y: 1.0)
You create a CAGradientLayer instance and make it full screen by setting its
frame to the view controller’s view bounds. Then you set the gradient
direction from the top-left corner (0, 0) to the bottom-right corner (1, 1):
Before you see anything on screen you need to also set the start and end colors of the gradient. Add this code to do that and add the gradient on screen:
gradient.colors = [
    UIColor(red: 0.0, green: 1.0, blue: 0.752, alpha: 1.0).CGColor,
    UIColor(red: 0.949, green: 0.03, blue: 0.913, alpha: 1.0).CGColor
]
view.layer.addSublayer(gradient)
This should successfully display the gradient by adding it to your view controller’s view’s layer (bah, that’s a mouth-full). Run the project and make sure you see something like that:
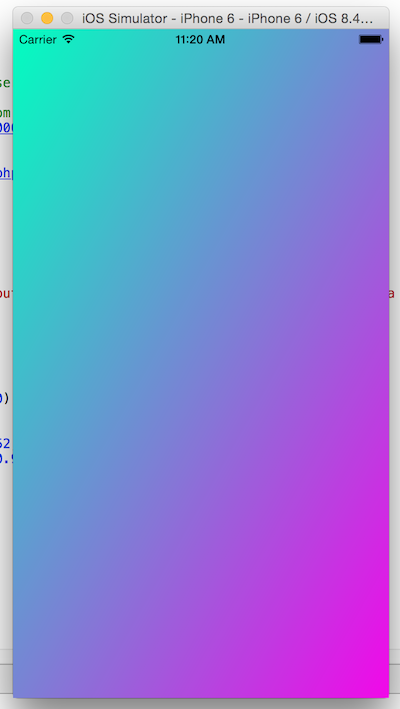
Groovy!
Okay - now let’s mask the gradient with the label… “What?” some of you are certainly saying just now. Well - just give it a try, will you?
Add to viewDidAppear():
gradient.mask = label.layer
This line makes any non-transparent content of the label view to mask the
contents of the gradient layer.
Run the project again to see the effect - you see the word “Text” appear not in its original black color but with the blue tint of the gradient on that exact spot. Let’s now add some animation to make this look a bit more interesting.
The typing animation
Add this new method that takes the characters one by one from its parameter and
adds them to label:
func punchText(text: String) {
  if text.characters.count > 0 {
    label.text = "\(label.text!)\(text.substringToIndex(text.startIndex.successor()))"
    delay(seconds: 0.04, completion: {
      self.punchText(text.substringFromIndex(text.startIndex.successor()))
    })
  } else {
    //finished punching text
  }
}
This method just adds one character every 0.04 seconds to label until there
are characters to add. It calls recursively itself so you only need to call it
once with the full text and then let it do its job.
Go back to viewDidAppear() and add at the end:
label.text = ""
punchText(story)
Run the app and enjoy the type animation:
Isn’t that just awesome? Yes I thought so :]
Additional mask animations
The type animation over the beautiful gradient background makes for a cool game into but you don’t need to stop there. You can add more to the gradient mask to make the introduction even more appealing.
First - let’s add a simple button-like animation when punchText() finishes
writing the story to hint the user they need to tap the screen when they are
ready reading.
You will use a simple shape animation to make three rings scaling up and down and teasing the player to touch them.
Let’s make a method that adds a ring shape on screen:
func addButtonRing() {
  let side: CGFloat = 60.0
  let button = CAShapeLayer()
  button.position = CGPoint(x: label.bounds.width * 0.5 - side/2, y: label.bounds.height * 0.85)
  button.strokeColor = UIColor.blackColor().CGColor
  button.fillColor = UIColor.clearColor().CGColor
  button.path = UIBezierPath(ovalInRect: CGRect(x: 0, y: 0, width: side, height: side)).CGPath
  button.lineWidth = 1.0
  button.opacity = 0.5
  label.layer.addSublayer(button)
}
In addButtonRing() you create a CAShapeLayer, set its position at the bottom
of the screen (so it appears just under the completed text), and finally you set
its shape to a hollow oval.
You add the CAShapeLayer to … label? Well - you want the new shape to be a
part of the mask so you do have to add the new layer to the label, as label
IS the gradient mask.
You’ll see the result in a moment - let’s first create some of those rings when
punchText() has finished.
Find the comment saying //finished punching text and add below (inside the
else block):
delay(seconds: 0.1, completion: addButtonRing)
delay(seconds: 1.2, completion: addButtonRing)
delay(seconds: 2.4, completion: addButtonRing)
Once punchText() runs out of characters it will call addButtonRing three
times after the respective delays. Let’s check out what will appear on screen
this time when you run the app (and wait for the complete text to appear):
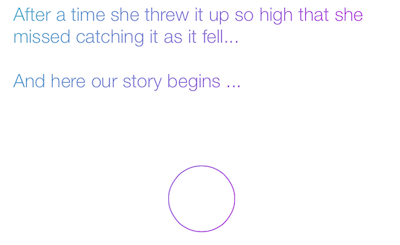
You added three rings but you see only one right now. Well - there are in fact three shape layers just there but they appear on top of each other so you can’t really tell they are there.
You will fix that by adding animations to them all. Scroll to addButtonRing()
and add at the end:
let scale = CABasicAnimation(keyPath: "transform.scale")
scale.fromValue = 1.0
scale.toValue = 0.67
scale.duration = 2.0
scale.repeatCount = Float.infinity
scale.autoreverses = true
button.addAnimation(scale, forKey: nil)
This simple animation will make each ring scale up and down indefinitely. This time around you will see the nice animation - not how all rings show up in the gradient colors they mask. So cool:

A neat little animation!
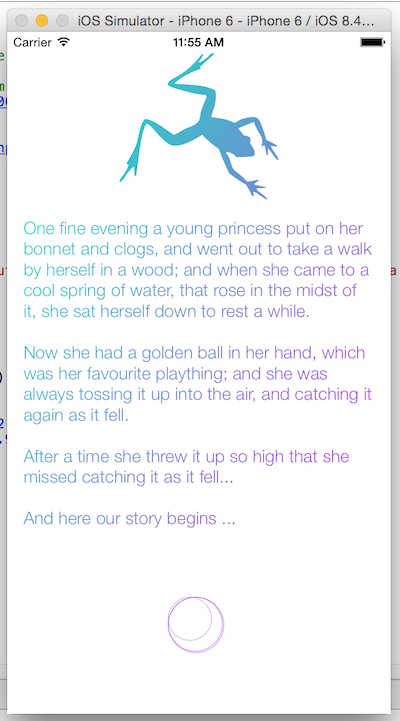
To make this introduction screen even more beautiful and wrap up with this tutorial let’s add a frog image on top of the screen.
You already have a frog image inside Images.xcassets (the image is Public domain - check the page where I took it from):
Back in ViewController.swift add to viewDidAppear():
let frog = UIImage(named: "frog")
let frogImage = UIImageView(image: frog)
frogImage.center.x = label.bounds.width/2
label.addSubview(frogImage)
You create an image view with the frog image and center it within the bounds
of label. Finally you just add the image view as a sub-view of label and you
are good to go.
Notice how you can build up your mask any way you want - previously you added a sub-layer to your mask-view, now you add a sub-view to it - it’s all good thanks to Core Animation.
Run the final project and enjoy:
Where to go from here?
If you want to experiment a bit further revisit Chapter 13, Gradient Animations from iOS Animations by Tutorials - think of how you can animate the background as well and create and even more psychedelic effect.
If you get to build something interesting based on this article ping me by replying to this email or on Twitter at @icanzilb.